Changing the dichroics on the TissueCyte
Replacing the dichroic beam-splitters in the emission path is easy. The procedure below describes how to swap out the dichroic and the plastic holder in which it is attached. There is no risk of misaligning detection path because you aren’t modifying the assembly that holds this plastic disk.
There are two emission dichroics. Our system came with a 560 nm long-pass dichroic, which allows “red” light to reach PMT 1 at the back of the enclosure; and a 500 nm long-pass dichroic that splits “blue” and “green”. Each dichroic is taped into a holder that sits in a 2” (SM2) lens mount. The blue/green holder is held in place on a magnetic base and is easily accessible. The red long-pass dichroic can be accessed by removing the left panel of the enclosure and loosening the clamp that holds it into place. There is a stop in the clamp to ensure the dichroic does not fall through when it’s loosened.
We usually run the system with the stock dichroics, but sometimes replace them for specialized acquisition runs. We perform the replacement by switching out the dichroic and the circular plate to which it is attached with a different unit. So we keep the same SM2 lens holder but change what is mounted in it.
Our dichroic holder looks like this:
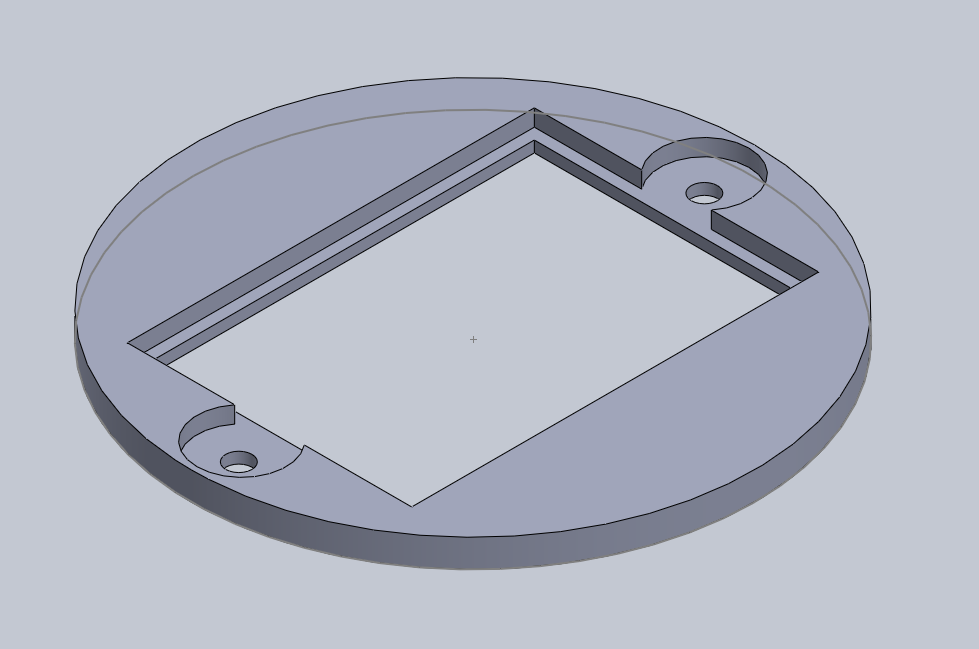

The unit can be 3-D printed and the design files are in the TissueVisionMods git repository. You can attach the dichroic of your choice into the holder. The dichroic is held in place using two M2 screws with plastic M2 washers. The part is designed to accept the screws without tapping. The first time you thread a screw into the hole there will be some resistance, so put a screw through it before attempting to mount a filter to minimize risk of damage to the filter from slips. Use an SM2 spanner wrench (SPW604) to perform the replacement. Ensure the coated surface is facing the incoming light. Handle the dichroics carefully! The surfaces are delicate.